


|
|
|
|
| 18 Signing and encrypting files | Contents |
|
You can use Gpg4win for signing and encrypting not just e-mails, but also individual files. The principle is the same:
Using the application GpgEX, you can sign or encrypt files out of Windows Explorer - with both OpenPGP or S/MIME. This chapter shows you exactly how this works.
If you are sending a file as an e-mail attachment, e.g. GpgOL will automatically look after signing and encrypting your file together with your e-mail. You do not have to do anything else.
When signing a file, you are mainly concerned about making sure it is not changed, rather than keeping it secret (Integrity).
Signing is very easy using GpgEX from the Windows Explorer context menu. Select one or more files or folders and use the right mouse key to select the context menu:
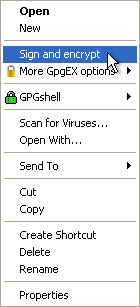
You will see the Sign and encrypt menu.
In the following window, select the option Sign:
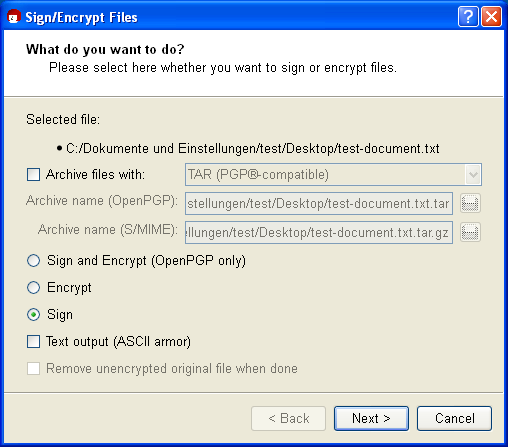
If required, you can also use the option Output as text (ASCII armor). The signature file will receive the file ending .asc (OpenPGP) or .pem (S/MIME). These file types can be opened with any text editor - you will however only see the numbers and letters you have already seen before.
If this option is not selected, the signature will be created with the ending .sig (OpenPGP) or .p7s (S/MIME). These files are binary files, and they cannot be viewed in a text editor.
Then click on [Next].
In the following dialog - if not already selected by default - select your private (OpenPGP or S/MIME) certificate with which you want to sign the file.

Now confirm your selection with [Sign].
Enter your passphrase in the pin entry dialog.
Once the signing process has completed successfully, the following window appears:
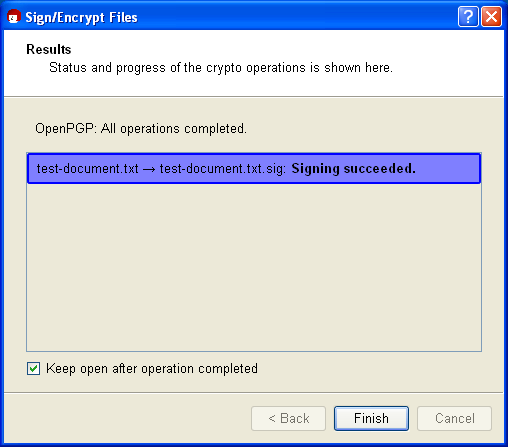
You have now successfully signed the file.
A "separate" signature is always used to sign a file. That means that your file that is to be signed will remain unchanged and a second file with the actual signature will be created. To verify the signature later on, you will need both files.
The example below shows which new file you will receive if you sign your selected file (here <dateiname>.txt) using OpenPGP or S/MIME. There are four possibler esulting file types:
Now check the integrity of the file that has just been signed, i.e. check that it is correct!
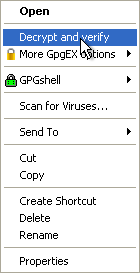
To check for integrity and authenticity, the signature file - hence the file with the ending .sig, .asc, .p7s or .pem - and the signed original file (original file) must be in the same file folder. Select the signature file and select the entry Decrypt and check from the Windows Explorer context menu:
You will see the following window:
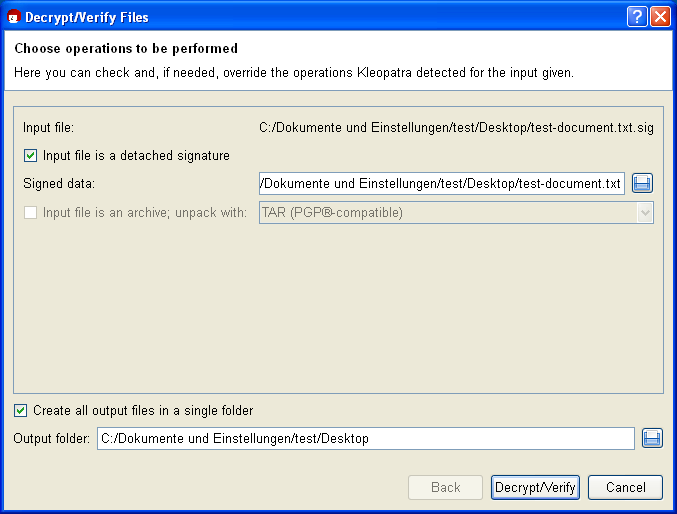
Under Enter file, Kleopatra shows the full path to your selected signature file.
The option Input file is a separate signature is activated since you have signed your original file (here: Signed file) with the input file. Kleopatra will automatically find the associated signed original file in the same file folder.
The same path is also automatically selected for the Ouput folder. It only becomes relevant however once you are processing more than one file simultaneously.
Confirm the operations with [Decrypt/Check].
Following a successful check of the signature, the following window appears:
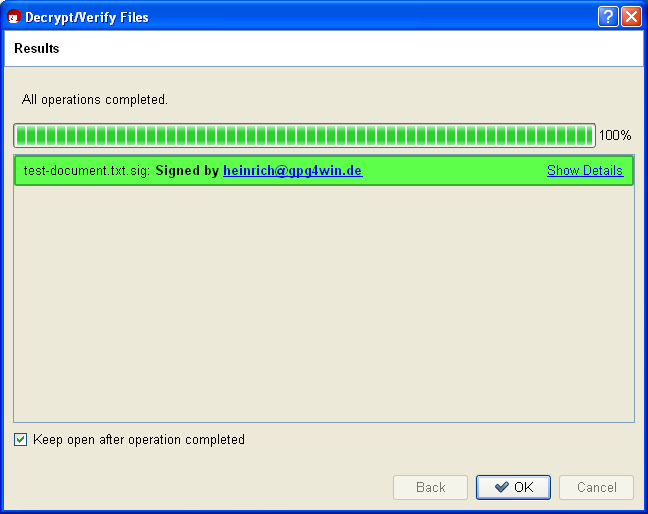
The result shows that the signature is correct - therefore you can be sure that the file's integrity has been preserved and therefore the file has not been modified.
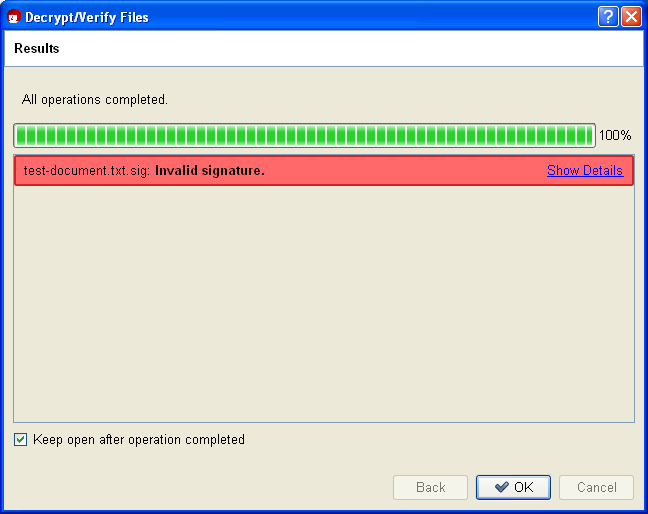
Even if only one character is added to the original file, or is deleted or modified, the signature will be shown as having been broken (Kleopatra displays the result as a red warning):
Files can be signed and encrypted just like e-mails. You should practice it once more in the following section using GpgEX and Kleopatra.
Select one (or more) file(s) and open the context menu using your right mouse key:
Select Sign and encrypt again.
You will see the already familiar dialog from signing a file (see also section 18.1).
In the top field, select the option Encrypt:
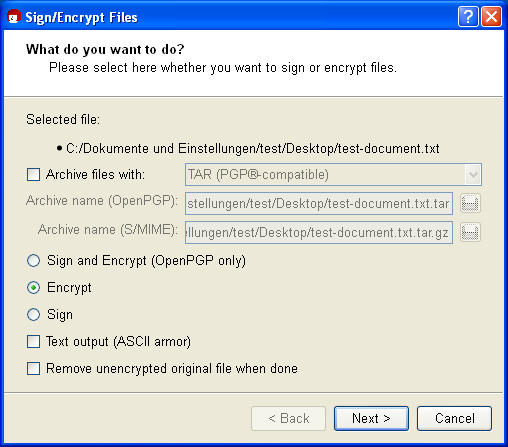
You should only change the encryption settings if this is required:
If this option is not selected, the system will create an encrypted file with the ending .gpg (OpenPGP) or .p7m (S/MIME). These files are binary files, so they cannot be viewed with a text editor.
Click on [Next].
Who should the file be encrypted for? Select one or more recipient certificates in the next dialog:
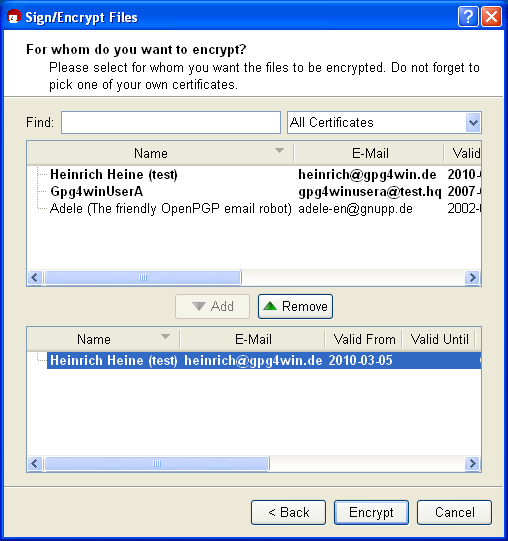
To make your selection, choose the required certificates in the top portion and press [Add]. You will see all selected certificates in the lower dialog portion for review purposes.
Depending on the selected recipient certificate and its type (OpenPGP or S/MIME), your file is then encrypted using OpenPGP and/or S/MIME. So if you selected an OpenPGP certificate and an S/MIME certificate, you will receive two encrypted files. The possible file types for the encrypted files are found on the next page.
Now click on [Encrypt]: The file is encrypted.
After a successful encryption, the results window should look something like this:
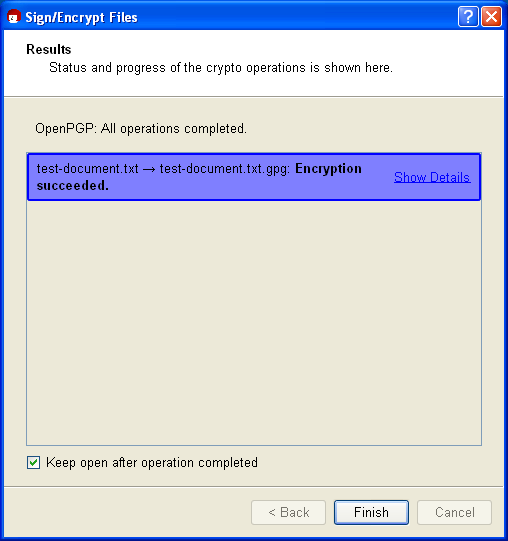
That's it! You have successfully encrypted your file!
Similar to signing a file, the result will depend on the selected encryption method (OpenPGP or S/MIME). An encryption of your original file (here <filename>.txt) can result in four possible file types:
You now forward one of these four possible encrypted files to your selected recipient. In contrast to signing a file, the unencrypted original file is of course not forwarded.
Now you can decrypt the previously encrypted file for test purposes.
To this end, you should also have encrypted to your own certificate during the previous encryption process - otherwise you cannot decrypt the file with your private key (see Chapter 14).
Select the encrypted file - hence one that ends with .gpg, .asc, .p7m oder .pem - and select the entry Decrypt and check in the Windows Explorer context menu:
If you like, you can still change the output folder in the following decryption dialog.
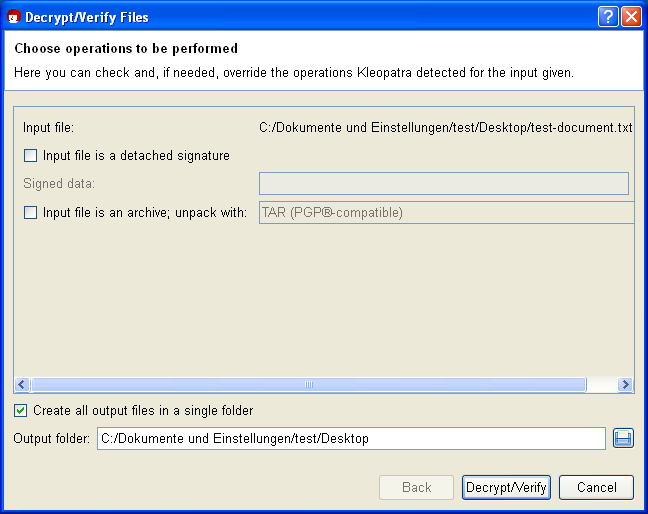
Click on [Decrypt/Check].
Then enter your passphrase.
The result shows that the decryption was successful:
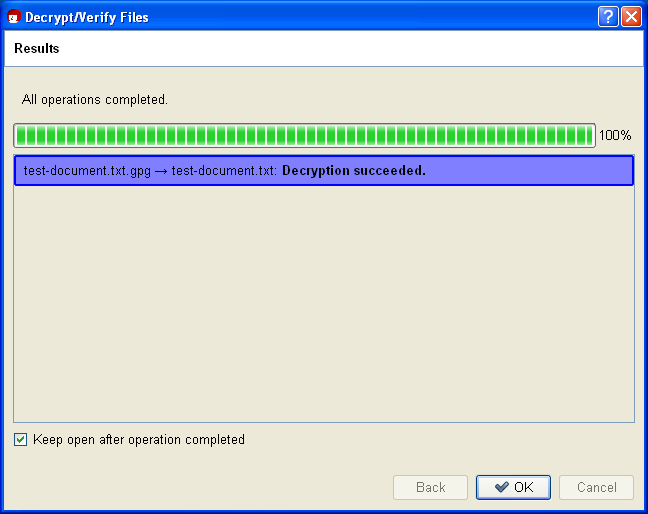
You should now be able to easily read the decrypted file or use it with a corresponding program.
You have learnt how to do the following using GpgEX:
You have probably already noticed this option in the corresponding dialogs. If you select it, GpgEX will combine both tasks in one step.
Please ensure that signatures are applied first, before the encryption process.
The signature is therefore always encrypted at the same time. It can only be viewed and checked by those who have successfully decrypted the file.
If you want to sign and encrypt the file, you can only do it with OpenPGP at this time.
© 31. August 2010, v3.0.0-beta1 (last minor changes from 21. September 2010)
The Gpg4win Compendium is filed under the
GNU Free Documentation License v1.2.
|
|
|
|
| 18 Signing and encrypting files | Contents |
|